Category: Employee Scheduling

Practical employee scheduling tutorials and examples.

  • How to Schedule Part-Time Employees Around Availability

    How to Schedule Part-Time Employees Around Availability

    Learning how to schedule part-time employees starts with checking their current availability, identifying the hours your business needs covered, and assigning realistic shifts. Review paid hours and the number of separate workdays, then confirm how schedule changes will be communicated. A part-time schedule should be understandable to employees and useful to the business.

    This guide uses fictional retail employees. “Part-time” is a planning description here, not a legal classification or a universal hours threshold. Employment definitions and obligations vary; verify the arrangements that apply to your team.

    Start with available windows and desired workload

    Ask each employee for workable times, dates the information applies and any approved exceptions. Record desired hours separately from availability. Someone may be available across five afternoons while seeking only three shifts. Conversely, a narrow window may leave little room to accommodate a requested total.

    Use a simple availability template and distinguish unavailable periods from preferences. Avoid collecting private explanations in a document shared across the team. Confirm how an employee should report a new restriction and when it will affect the roster.

    Identify suitable blocks of work

    Break the operating day into periods: opening, regular service, peak demand and closing. Determine which tasks need continuity and which can be covered by a shorter shift. A four-hour assignment may be useful during a predictable rush, but a short shift with a long commute may be unattractive to an employee. Discuss the practical arrangement rather than assuming every open window should be filled.

    Check the skills needed for each block. An employee available during opening is not automatically qualified to open alone. Plan supervision, handovers and training explicitly. The coverage-planning guide explains how to separate role requirements from total headcount.

    A worked part-time schedule

    The following fictional service assignments fit three different availability patterns. All shifts are daytime, and the break column is an unpaid deduction used only for arithmetic. Whether a particular break arrangement is appropriate must be checked separately.

    Fictional weekly part-time assignments
    Employee Assignments Unpaid break per shift Weekly paid hours
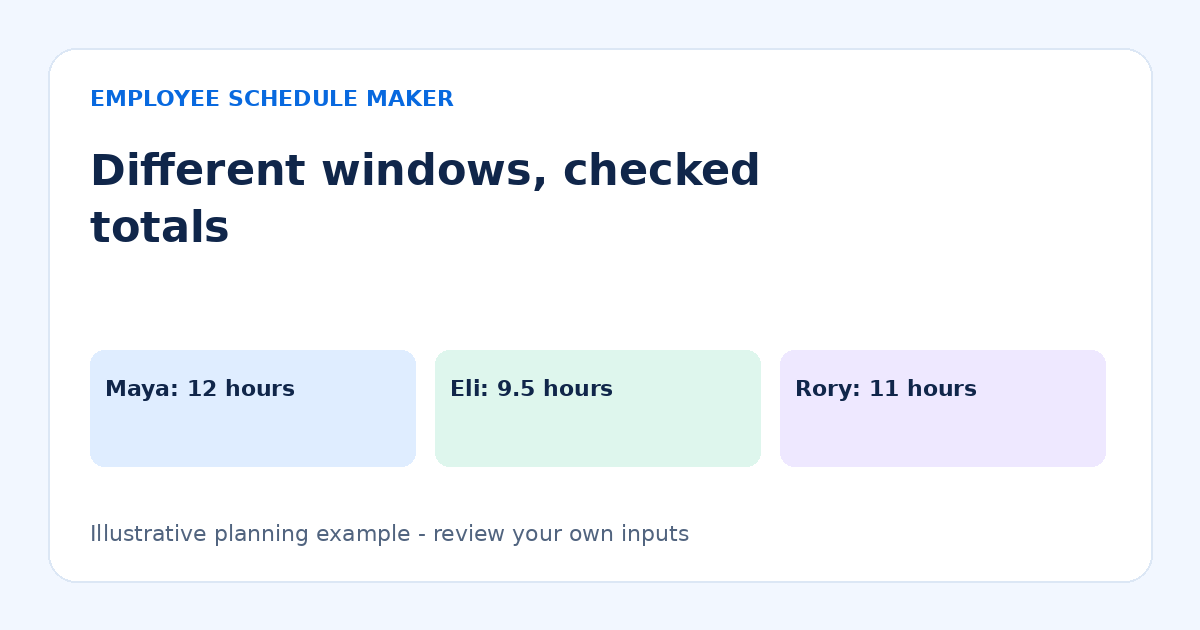
    Maya Mon, Wed, Fri 09:00–13:00 0 minutes 12
    Eli Tue, Thu 16:00–21:00 15 minutes 9.5
    Rory Sat, Sun 10:00–16:00 30 minutes 11

    Maya has three four-hour shifts: 3 × 4 = 12 paid hours. Eli has two five-hour shifts less 0.25 hours each: 2 × 4.75 = 9.5. Rory has two six-hour shifts less 0.5 hours each: 2 × 5.5 = 11. The schedule totals 32.5 paid hours across seven assignments.

    This table does not prove the shop is covered all week. There is no assignment shown for Monday afternoon, for example. Combine these assignments with the rest of the roster and check each interval. Employee totals and business coverage are related but different calculations.

    Build the schedule step by step

    1. Choose the correct week

    Confirm the Monday start date and relevant events before entering shifts. A repeating pattern still needs a date-specific check for approved absences, changed availability or a different trading day.

    2. Place essential coverage first

    Assign the periods with the fewest qualified available employees. Then fill flexible work. If a required period cannot be covered, address it openly rather than assigning a shift outside someone’s confirmed availability.

    3. Check paid hours and separate workdays

    Use the work-hour calculators or editor totals to verify minutes and breaks. Also count attendance days. Twelve hours across three days and twelve hours across six days can have very different practical effects.

    4. Review split shifts and adjacent assignments

    If someone has two shifts in one day, check the gap, travel and total work pattern. The editor supports multiple shifts per day and flags overlapping assignments for the same person. It does not evaluate whether a split-day arrangement suits the employee or meets all applicable requirements.

    5. Confirm and share the current version

    Give employees a clear way to report a mistake. Once approved through your process, share a dated PDF or printout. Keep a JSON backup of the editable workspace separately; a shared PDF is not a restorable schedule database.

    Handle extra hours and changes deliberately

    When demand increases, check who is available and qualified before offering an extra shift. Record whether the employee accepted, which dates are affected and whether the change is temporary. Do not silently turn an occasional extra assignment into a permanent availability assumption.

    If an employee asks to swap, review both sides. A same-duration exchange may preserve weekly totals while creating a coverage or availability problem. Use a consistent schedule-change request process and notify the affected people after the decision.

    Copying last week can reduce re-entry, but the copy still needs review. The tool’s copy action protects a destination week that already contains shifts. It does not decide whether the old pattern remains suitable for new availability.

    Common mistakes

    • Assuming all part-time employees want the same hours. Ask about the actual desired workload and current availability.
    • Ignoring the edges of a shift. Include preparation, cleanup and handovers where required.
    • Using breaks to force a target total. Break deductions should describe a real planned arrangement, not conceal an overlong assignment.
    • Publishing multiple competing versions. Identify the current roster clearly and communicate replacements.
    • Relying on browser storage alone. Browser data can be cleared. Download a JSON backup before major changes.

    Review the pattern with the employee

    Before repeating the example, ask whether the arrangement works in practice. Maya’s three four-hour assignments may fit her availability well, while six two-hour assignments could create an unwelcome number of trips despite the same twelve-hour total. The roster should make those attendance days visible, not hide them behind a weekly hours figure.

    Consider a change from Eli’s two five-hour assignments to one six-hour and one four-hour assignment. With a 15-minute unpaid break in each, the paid total remains 9.5 hours: 5.75 plus 3.75. The total is unchanged, but the finish times and coverage contribution differ. Check whether the longer assignment fits Eli’s availability and whether the shorter one still covers the required work.

    Record whether a variation is a one-week arrangement or a recurring change. Review the next relevant dates rather than automatically copying the exception. If the employee’s desired hours change, confirm that separately from their available windows. This prevents a manager from interpreting broad availability as a request for every possible assignment, or interpreting a low-hours week as a permanent reduction.

    Frequently asked questions

    How many hours should a part-time employee receive?

    There is no single number this guide can prescribe. Consider the relevant agreement, availability, role needs and applicable obligations. The tool calculates the shifts you enter; it does not classify employment or determine entitlement.

    Can a part-time employee work an overnight shift?

    The editor can represent an overnight shift shorter than 24 hours. Review suitability, availability and applicable requirements separately. See the overnight guide for how hours are attributed.

    Can I save different weekly patterns?

    The browser workspace stores dated weeks. Navigate to the intended week and review its assignments. A JSON backup preserves employees and saved schedules; a template link replaces the current workspace only after confirmation.

    Start with one reviewed week

    Open the part-time employee schedule template, replace the fictional names and verify each assignment against availability. Check hours, coverage and practical workdays before sharing the approved roster.
  • How to Create a Two-Week Employee Schedule

    How to Create a Two-Week Employee Schedule

    To make a two-week employee schedule, plan two consecutive Monday-to-Sunday weeks, check both weeks separately and review the Sunday-to-Monday boundary between them. Label each week clearly. A two-week view helps you see recurring patterns and changes, but it does not remove the need to confirm availability and coverage for each date.

    The Employee Schedule Maker edits one week at a time and saves dated weeks in the same browser workspace. It does not display a combined fortnight grid. This guide shows a practical two-week workflow using those existing features, with fictional assignments and checked arithmetic.

    Define the dates before entering shifts

    For this example, Week A runs Monday 9 November to Sunday 15 November 2026. Week B runs Monday 16 November to Sunday 22 November 2026. Write both ranges in your planning notes and use the editor’s week navigation to verify where you are working.

    Collect availability covering the full period, including approved exceptions. An employee may be available Monday in Week A and unavailable Monday in Week B. Do not interpret a recurring weekday preference as proof that every date is available.

    Prepare the first week

    1. Open the schedule maker and select Week A.
    2. Check employee names and roles. Add or edit employees as needed.
    3. Build the essential coverage, then assign flexible work.
    4. Review paid hours, breaks, overnight assignments and same-person overlaps.
    5. Compare the roster with availability and your coverage plan.
    6. Download a JSON backup before beginning extensive changes to the second week.

    Browser storage saves the workspace locally when available, but clearing browser data can remove it. A backup is a separate file that you should keep securely. It is not automatically synchronized between devices or browsers.

    Build the second week safely

    Navigate to Week B. If it is empty and the pattern is useful, choose Copy Last Week. The copy action protects a destination week that already contains shifts; it should not be used to erase an existing plan. If Week B already contains work, review and edit it directly instead of assuming a copy is needed.

    A copied shift is only a starting point. Change dates with different availability, adjust events and check whether the role mix is still suitable. If the two weeks are intentionally different, entering Week B independently can be clearer than copying a heavily altered pattern.

    A checked two-week example

    Fictional employee totals across two weeks
    Employee Week A Week B Two-week paid total
    Maya 4 × 09:00–17:00, 30m break = 30h 3 × 09:00–17:00, 30m break = 22.5h 52.5h
    Eli 3 × 16:00–22:00, 15m break = 17.25h 4 × 16:00–22:00, 15m break = 23h 40.25h

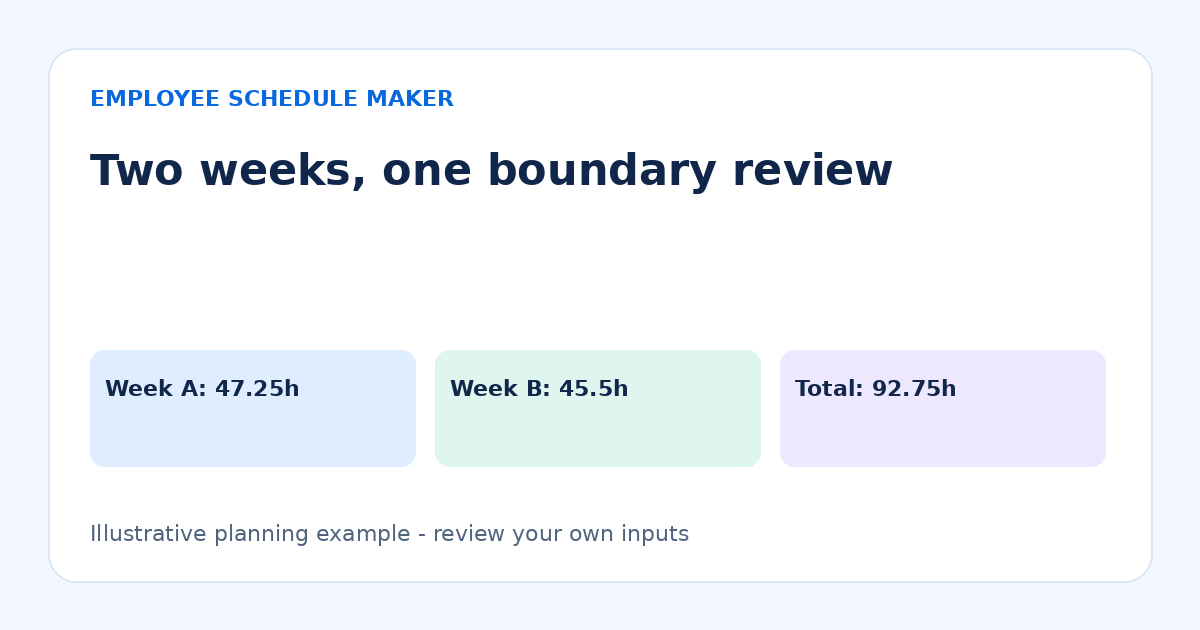
    An eight-hour elapsed shift less a 30-minute unpaid break is 7.5 paid hours. A six-hour elapsed shift less 15 minutes is 5.75 paid hours. Week A therefore totals 47.25 paid hours, Week B totals 45.5, and the combined schedule total is 92.75. The editor displays each selected week’s total; add the two exported weekly totals for this separate fortnight comparison.

    Do not use the two-week total to assume that a high week and a low week can be averaged for payroll or compliance purposes. The appropriate treatment depends on the applicable rules and arrangements. This example is a planning calculation only.

    Review the boundary between weeks

    Check Sunday overnight shifts carefully. A Sunday 22:00–Monday 06:00 assignment appears under its Sunday start date. If the same person is assigned Monday 05:30–09:00 in Week B, there is a 30-minute cross-week overlap. Reviewing only one week’s visible grid may not reveal the whole situation.

    Keep both weeks’ exports available during review and compare the final Sunday assignments with the following Monday. Also review the work pattern on either side of the fortnight. The end of your planning window is not necessarily the end of an employee’s consecutive work pattern.

    Read overnight shifts and unpaid breaks for the distinction between elapsed duration, paid time and start-date attribution. The tool uses entered wall-clock times and is not a timezone-aware attendance system.

    Share a two-week schedule without version confusion

    Print or save each week as PDF using the browser print dialog, selecting the intended week first. Name files clearly, for example “Week-A-2026-11-09-r1.pdf” and “Week-B-2026-11-16-r1.pdf.” Review print preview to make sure all employee rows and columns are included.

    If you combine the files outside this tool, preserve both date ranges and revision labels. When one week changes, explain which document it replaces. A new PDF does not update older downloaded copies automatically. Use one agreed communication channel for the current version.

    CSV provides tabular data for a selected week. JSON is the editable backup for the workspace, including saved weeks. The backup and sharing guide explains which file is suitable for each purpose. Do not expect a PDF or CSV to restore the whole workspace.

    Common mistakes

    • Editing the wrong week. Check the date range before entering or exporting shifts.
    • Copying before checking exceptions. Review actual dates and availability after every copy.
    • Ignoring the week boundary. Compare overnight Sunday finishes with Monday starts.
    • Assuming a two-week total settles payroll questions. Keep planning totals distinct from actual work records and applicable requirements.
    • Restoring an old backup casually. Restore replaces the workspace after confirmation, so first back up current work.

    Reconcile a change made after Week A is shared

    Suppose Maya’s Week B availability changes after you have already distributed Week A. Select Week B explicitly and edit the affected assignments there. Do not restore an older whole-workspace backup simply to retrieve the original pattern unless you intend to replace all saved weeks. A restore affects more than the currently visible grid.

    After editing, compare Week B’s new total with its earlier export and check the boundary with Week A again. If an overnight Sunday assignment in Week A is involved, the correction may affect both files. State which date ranges changed and whether each earlier export remains current.

    Download a fresh JSON backup after the approved edits and identify it by date or revision. Keep the two weekly sharing files separate from that backup. If another manager must edit the workspace, agree who holds the current editable copy and how changes will be reconciled; browser storage does not provide automatic collaboration or merge two managers’ edits. A clear handoff avoids accidentally replacing newer Week B work with an older copy that still contains the correct Week A roster.

    Frequently asked questions

    Can I display both weeks together in the editor?

    The current editor is weekly. Navigate between the two saved weeks and use separate exports for review. This guide does not imply there is a fortnight view or automatic combined fortnight calculation.

    Does Copy Last Week duplicate employees?

    The action copies the previous week’s shifts within the existing workspace. It uses the current employee records. Review the result, particularly if employee roles or availability changed.

    Can I start with a template?

    Yes. Choose a relevant weekly template and review the template-loading confirmation. Loading replaces the browser workspace when confirmed, so download a JSON backup first. Build the second week only after the first is checked.

    Finish with two checks, not one

    Review each week for coverage and hours, then review the connection between them. That final boundary check is the main extra discipline a two-week schedule needs.

  • 2-2-3 Rotating Shift Schedule: Pattern and Hours

    2-2-3 Rotating Shift Schedule: Pattern and Hours

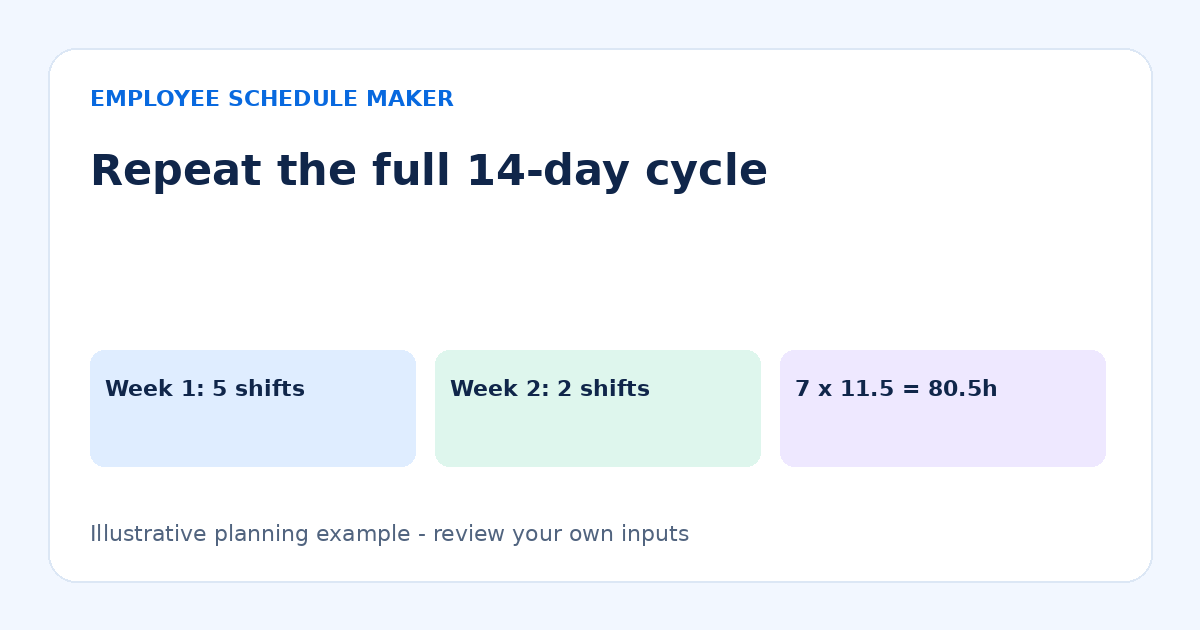
    A 2-2-3 rotating shift schedule usually means working two days, taking two days off, and working three days, followed by the complementary pattern in the next week. With 12-hour assignments, a worker has seven shifts across 14 days: 84 elapsed hours before breaks. The pattern can be used in continuous operations, but the schedule alone does not provide break relief or absence cover.

    This guide explains a fixed day/night example with four fictional teams. It does not recommend 12-hour shifts for every workplace, establish legal limits or promise better health or productivity. Assess the actual work and applicable obligations before adopting a rotation.

    Read the 14-day pattern

    For Pattern A, Week 1 has work on Monday, Tuesday, Friday, Saturday and Sunday. Week 2 has work on Wednesday and Thursday. Pattern B works the opposite dates. Together the two patterns cover every date once for a given shift block.

    Complementary 2-2-3 patterns; W = assigned, — = off
    Pattern Mon Tue Wed Thu Fri Sat Sun
    A, Week 1 W W — — W W W
    B, Week 1 — — W W — — —
    A, Week 2 — — W W — — —
    B, Week 2 W W — — W W W

    Repeat the full fortnight, not just Week 1. Repeating the five-shift week for Pattern A would create a different workload. Label the dates and the cycle week explicitly so that a calendar month boundary does not reset the rotation accidentally.

    Apply day and night blocks

    In a simple fixed-block example, Team A follows Pattern A on days, 07:00–19:00. Team B follows Pattern B on days. Team C follows Pattern A on nights, 19:00–07:00 the following day. Team D follows Pattern B on nights. Each team represents the people needed for its block, not necessarily one person.

    For each start date, either A or B supplies the day block, and either C or D supplies the night block. That gives a base 24-hour pattern. It does not include additional overlap for handover or relief for an employee who leaves the position during a break.

    The word “rotating” can refer to rotating workdays, rotating day/night blocks, or both. This example rotates workdays while keeping teams on fixed day or night blocks. Switching between days and nights would require a separately designed and reviewed transition; it is not silently included here.

    Check hours in each week

    Pattern A has five 12-hour shifts in Week 1 and two in Week 2. That is 60 elapsed hours followed by 24, totaling 84. With a 30-minute unpaid break in every shift, each shift is 11.5 paid hours: Week 1 is 57.5, Week 2 is 23, and the fortnight total is 80.5.

    The arithmetic average is 40.25 paid hours per week, but the individual weeks remain 57.5 and 23. Do not treat the average as permission to average hours for payroll or other legal purposes. Check the applicable rules separately. Pattern B has the same fortnight total with the high and low weeks reversed.

    Use the paid-hours calculators to verify duration inputs and the two-week planning workflow to review both weeks. The current editor displays one week at a time, so keep both weekly exports available for comparison.

    Why four teams are not automatically enough

    The four-team diagram assigns every base day and night block. If each block needs one person and every shift includes a 30-minute unpaid break away from the position, the primary assignments leave one hour per day needing relief. Across a fortnight that is 14 hours of relief coverage, before leave or absence.

    If the operation needs a lead and two service employees at all times, a “team” must supply that role mix. Do not count an off-duty team as freely available cover without an explicit arrangement. Check the 24/7 headcount calculation to distinguish base pattern capacity from realistic coverage contribution.

    Build and review a dated example

    1. Choose a Monday as the start of Cycle Week 1.
    2. Assign the day and night teams and list their required skills.
    3. Enter Pattern A and Pattern B for Week 1.
    4. Navigate to the next week and enter the complementary assignments.
    5. Review unpaid-break deductions and separately plan timed relief.
    6. Check Sunday-night finishes against Monday assignments in the following week.
    7. Review the workload pattern and any proposed day/night transitions before use.

    The 2-2-3 template provides an editable starting example. Read its instructions and verify which dates and teams it includes. Opening a template in the editor requires confirmation because it replaces the browser workspace. Download a JSON backup first if you need to preserve current work.

    Common mistakes

    • Repeating only seven days. Preserve the complete 14-day cycle.
    • Confusing a team with one employee. Define the required role mix within each block.
    • Calling the average the weekly total. Show the high and low weeks separately.
    • Ignoring breaks and handovers. Base shift boundaries do not establish continuous staffed coverage.
    • Switching day/night blocks casually. Review transitions as a separate planning decision.

    Follow the cycle through a calendar boundary

    A repeating fortnight does not restart because a new month begins. Write “Cycle Week 1” or “Cycle Week 2” beside each actual Monday in your planning record. If the final Sunday of a month belongs to the five-shift week, the next Monday begins the complementary week even when a monthly calendar makes the pattern look disconnected.

    Check one named night worker through that transition. A Sunday 19:00–Monday 07:00 assignment belongs to Sunday’s start date in this tool. Do not add a Monday morning assignment merely because Monday’s cell appears empty in the next week. The overnight work extends into that date, and the wider work pattern still needs review.

    When a team member is absent, retain the underlying cycle and record the actual replacement assignment separately. Copying a substitute’s exceptional week indefinitely can accidentally create a new pattern with different hours. After a substitution, compare both the absent employee’s roster and the replacement’s surrounding assignments.

    Before sharing a new cycle, verify all fourteen dates against the pattern table, then inspect the following Monday as a boundary check. This is especially useful when a schedule is printed one week at a time: the first page can look correct while the connection to the second page is wrong.

    Frequently asked questions

    Can you give an example of a rotating shift schedule?

    Use the dated 2-2-3 example above: Pattern A works Monday, Tuesday and Friday through Sunday in Week 1, then Wednesday and Thursday in Week 2. Pattern B does the opposite. Assign separate day and night teams to those patterns and review actual relief and availability. The example rotates workdays; it does not automatically move employees between day and night blocks.

    Is a 2-2-3 schedule the same as any four-team schedule?

    No. Four teams can follow different cycles. The defining feature here is the complementary two-on, two-off, three-on pattern across two weeks. Names for shift systems can vary, so inspect the actual dated assignments.

    Does every employee get alternate weekends off?

    In the simple complementary pattern shown, each pattern works one full weekend and has the next off. Exceptions, leave and substitutions can alter that outcome. Check the named roster rather than relying only on the pattern label.

    Can the editor assess fatigue or compliance?

    No. It records shifts and calculates entered wall-clock durations. It is not a fatigue model or a legal compliance checker. Use qualified guidance appropriate to the operation.

    Test before adopting

    Walk through a complete fortnight with named employees, required roles, relief and absence scenarios. A rotation is useful only if its real assignments are workable, not merely because the pattern fills a table.

  • How Many Employees Do You Need for 24/7 Coverage?

    How Many Employees Do You Need for 24/7 Coverage?

    To estimate how many employees for 24/7 coverage your business needs, start by calculating the total weekly coverage hours and each employee’s available working hours.

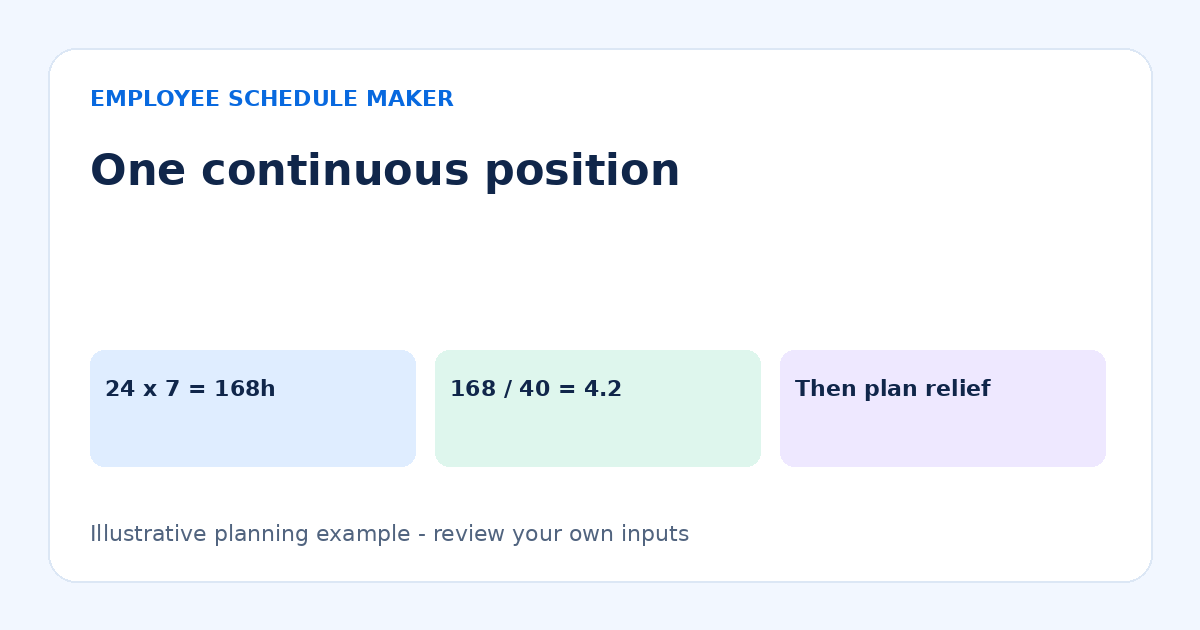
    One continuously staffed position needs 24 × 7 = 168 coverage hours each week. Divide those hours by the realistic weekly coverage contribution per employee to get a starting headcount. Then add the effect of breaks, leave, training, handovers and absence. The arithmetic gives a capacity estimate, not a complete or legally compliant roster.

    This guide shows how to calculate a 24/7 staffing estimate without confusing coverage with paid hours or choosing a shift pattern too early. All examples are fictional. Use your own operating requirements and verify employment, safety and other applicable obligations separately.

    Define the position that must remain covered

    Start with a role and location. “One service position at all times” is different from “one qualified lead plus two service positions.” If roles cannot substitute for one another, calculate them separately. If demand varies, use a coverage matrix rather than multiplying every period by the highest headcount.

    For one position continuously covered, the requirement is 168 position-hours per week. For two positions continuously covered, it is 336. This is not the same as employing one or two people: the positions persist while employees rotate through assignments.

    Calculate the theoretical minimum

    Suppose a fictional employee could contribute 40 hours of actual position coverage per week. For one continuous position, 168 ÷ 40 = 4.2. Four people would supply only 160 hours, leaving eight uncovered. Rounding up gives five people as a theoretical capacity starting point, before reviewing whether their available shifts can fit the pattern.

    The 40-hour input is an assumption, not a recommended workload or a legal threshold. It also assumes every one of those hours covers the required position. If some time is spent in training, meetings or uncovered breaks, the useful coverage contribution is lower.

    Illustrative weekly capacity estimates for one continuous position
    Coverage contribution per employee 168 divided by contribution Rounded-up starting count
    40 hours 4.20 5
    36 hours 4.67 5
    32 hours 5.25 6

    These rows are scenarios, not staffing recommendations. A rounded count can still fail if everyone is unavailable for the same night or if only one employee has the required qualification.

    Keep elapsed time, paid time and coverage distinct

    Imagine two 12-hour assignments covering a day: 07:00–19:00 and 19:00–07:00. The elapsed assignments total 24 hours. If each includes a 30-minute unpaid break, the paid total is 23 hours. If the position cannot be left unattended, somebody must provide the missing one hour of coverage.

    Over seven days, those unpaid breaks remove seven hours from the primary workers’ coverage if they leave the position for each break. Relief must be planned at actual times. Another worker’s unpaid-break deduction does not magically create coverage elsewhere.

    The paid-hours calculators can verify the deduction. They cannot determine whether a position is attended or whether a break arrangement is appropriate. Record a timed relief plan separately; the editor stores the length of unpaid breaks rather than their placement.

    Add operational allowances without inventing a percentage

    Instead of applying a generic “staffing buffer,” list the work that reduces coverage capacity. Include planned leave, required training, meetings away from the position, handover overlap and foreseeable absences using information appropriate to your operation. State each assumption and the period it covers.

    For example, if your planning assumption is that each employee contributes 36 coverage hours in the relevant week, use 36 in the divisor rather than calling all paid time coverage. If contribution varies significantly across weeks, review a longer period and individual peak weeks. A yearly average can conceal a week with several simultaneous absences.

    Choose a pattern after checking capacity

    Possible patterns include three eight-hour blocks, two twelve-hour blocks or another arrangement suited to the work. None is automatically appropriate. Longer shifts reduce the number of daily handovers but change fatigue, relief and availability considerations. Shorter shifts require more changeovers. Assess the actual tasks and conditions rather than choosing solely for an attractive grid.

    A 2-2-3 rotation is one way to arrange 12-hour assignments across a repeating fortnight. A four-team diagram may cover the base position on paper, yet still provide no spare capacity for breaks or absence. The rotation pattern and the staffing allowance are separate decisions.

    Test the proposed roster interval by interval

    1. List every required position and qualification.
    2. Map all seven days, including midnight boundaries.
    3. Assign named, available employees to each block.
    4. Place handovers and relief at actual times.
    5. Check the same employee is not double-booked.
    6. Review weekly hours, neighboring weeks and the practicality of the work pattern.
    7. Test what happens when a planned absence occurs.

    Use a night-shift or rotating template as an example to edit, not as proof of suitable staffing. The schedule maker helps record shifts and paid totals, but it does not optimize a 24/7 workforce or assess fatigue.

    A two-position example

    Suppose you need two service positions continuously and estimate 36 coverage hours per employee per week. The requirement is 2 × 168 = 336 hours. Dividing by 36 gives 9.33, so the rounded-up starting count is 10 employees for that role. If you also need a separate lead at all times, calculate that lead requirement separately rather than counting the same ten employees twice.

    Ten people at 36 contribution hours offer 360 hours of theoretical capacity, 24 more than the 336-hour requirement. That difference does not guarantee a workable roster. Check whether the extra capacity is available during the intervals that need it and whether the assumed contributions already account for the relevant absences.

    Stress-test the estimate before naming it a plan

    Take the proposed headcount and remove one person for a planned absence in a test week. Identify the exact uncovered blocks rather than simply subtracting a weekly total. A team may have spare daytime capacity while lacking a qualified night worker. That is a distribution problem, even if the aggregate capacity appears sufficient.

    Next test a training session that removes a required worker from the position for two hours. Decide who covers those hours and whether that person still covers their own work. Counting the same worker as both trainer and active coverage can make a plan look complete when it is not.

    Finally check the handover assumption. If both the outgoing and incoming worker need fifteen minutes together, those minutes add scheduled overlap beyond the base 168 position-hours. Record how many handovers occur and which roles participate. Do not add an arbitrary allowance without explaining its purpose. These small tests turn a capacity estimate into questions you can resolve before publishing named shifts, while keeping clear which assumptions remain uncertain.

    Frequently asked questions

    Can four employees cover one 24/7 position?

    Four employees averaging 42 coverage hours each provide 168 hours arithmetically. That leaves no extra coverage capacity in the simple model. Whether any such arrangement is appropriate requires a separate review of the work, breaks, absence, qualifications and applicable requirements.

    Should I round 4.2 down to four?

    No, not if each person contributes only the assumed 40 coverage hours. Four gives 160, which is below 168. Rounding up is only the starting capacity step, not the final roster.

    Does the tool calculate required headcount?

    No. This guide provides the method. The editor calculates entered shift hours and identifies certain overlaps; managers supply the coverage requirements and staffing decisions.

    Document the assumptions

    Write down the positions, coverage hours and contribution assumption beside the draft roster. Review them whenever operating hours, roles or availability change. A transparent estimate is easier to correct than an unexplained headcount.

  • How to Edit an Employee Schedule in Excel

    How to Edit an Employee Schedule in Excel

    Learning how to edit an employee schedule in Excel starts with updating employee details, shift times, and breaks while keeping the workbook formulas intact.

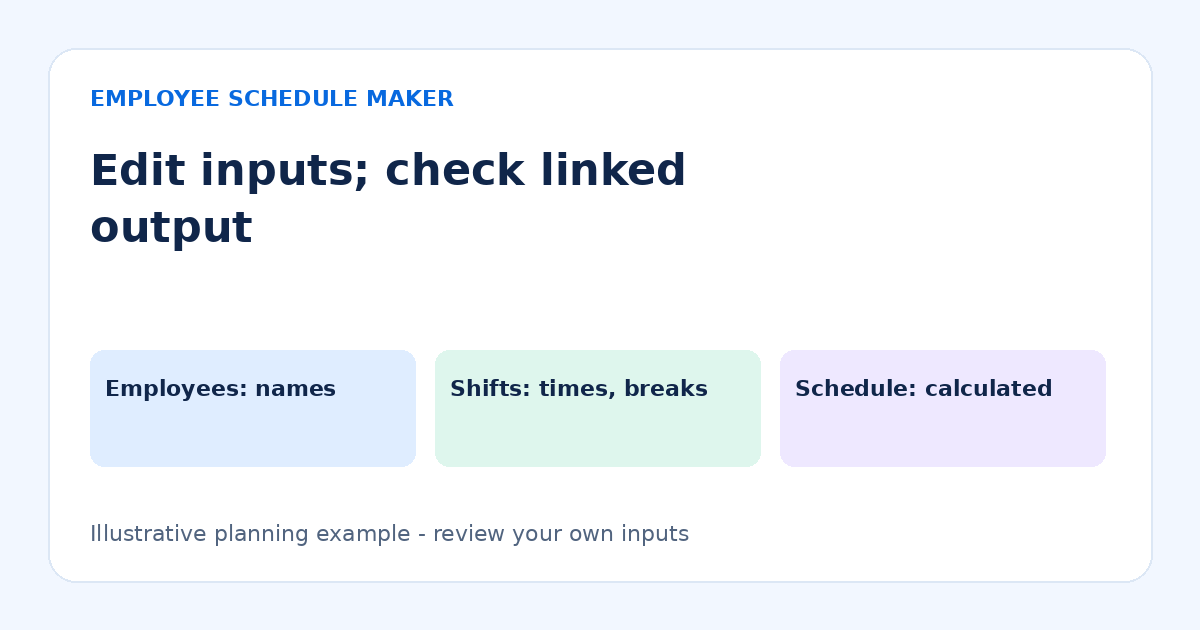
    To edit an employee schedule in Excel, download the real .xlsx workbook, change names and roles on the Employees sheet, and edit time values and unpaid-break minutes on the Shifts sheet. Leave calculated cells intact. Check the Schedule sheet and any CHECK warnings before sharing the result.

    This guide applies to the Excel downloads in the free scheduling templates. It explains the workbook’s actual sheets and limitations. Downloading a CSV and renaming it .xlsx will not create this workbook or its formulas.

    Choose dates before downloading

    Select the template and intended starting date in the browser. Use its editable preview to set up employees and example shifts, then download Excel. For monthly or rotating examples, read the template’s instructions and confirm the displayed date range before exporting.

    The exported workbook is a separate file. Editing it does not update the browser workspace or another person’s copy. If you need to keep working in the website, download a JSON backup or use Open in Schedule Maker before leaving the template preview. The editor does not import an edited Excel workbook.

    Understand the four worksheets

    Sheets in an Employee Schedule Maker template workbook
    Sheet Purpose What to edit
    Instructions Dates, template guidance and calculation limits Read before editing
    Employees Employee IDs, names and roles Name and role fields
    Shifts One employee/date row with times, break and paid hours Start, end and unpaid-break minutes
    Schedule Linked readable grid and employee paid-hour totals Review calculated output

    Keep row order, employee IDs and fixed dates unchanged. The workbook’s formulas link specific rows. Sorting only one sheet or replacing IDs can break those relationships. To change the date range or number of employees safely, adjust the browser template preview and export a fresh workbook.

    Edit employee names and roles

    On Employees, replace fictional names with the intended names and roles. Do not overwrite the ID column. The Shifts and Schedule sheets use linked formulas to display names and roles, so changing the source fields avoids inconsistent labels.

    If a name does not appear elsewhere, check that automatic calculation is enabled in your spreadsheet application and that the linked cells still contain formulas. Avoid pasting an entire table over the workbook, which can replace formulas along with the text you meant to change.

    Enter real spreadsheet time values

    On Shifts, enter times in the Start and End fields as spreadsheet time values in whole minutes, such as 09:00 and 17:00. Verify that your application interprets them as times rather than text. The display may show AM/PM; the underlying value still needs to be a valid time of day.

    For a day off, leave both start and end blank. To add an assignment on an existing off-day row, enter both times. One missing time is an incomplete shift and should produce CHECK. Equal start and end times are invalid; the workbook does not treat them as a 24-hour shift.

    Enter unpaid breaks as whole minutes, such as 30, not “30m” or 0.5 hours. The break must be nonnegative and shorter than the elapsed shift. A numeric zero means no unpaid deduction. This is a planning input, not a determination of which time should legally be unpaid.

    Check a worked daytime example

    For fictional Maya, enter 09:00–17:00 with a 30-minute unpaid break on four days. Each shift has eight elapsed hours less half an hour, giving 7.5 paid hours. The weekly total is 4 × 7.5 = 30. The Schedule sheet should show the assignments and the linked total.

    If you change one finish to 16:00 while keeping the 30-minute break, that shift becomes 6.5 paid hours. The weekly total becomes 29. If the total stays at 30, check calculation settings and whether the formula cell was overwritten. Do not type a replacement total to conceal a broken formula.

    Check an overnight example

    For fictional Eli, enter 22:00–06:00 with a 45-minute unpaid break. The earlier finish on the clock means the following day: eight elapsed hours less 0.75 gives 7.25 paid hours. The Ends next day column should indicate Yes, and the readable grid marks the following-day finish.

    Hours count toward the assignment’s start date in this workbook. It does not split a Sunday overnight shift across two payroll weeks. The calculations use wall-clock time and do not adjust for daylight-saving changes or time zones. See overnight shifts and unpaid breaks for the implications.

    Resolve CHECK warnings before sharing

    • One time is missing. Enter both times, or clear both for a day off.
    • The time is text or outside a day. Re-enter it as a valid spreadsheet time value.
    • The break equals or exceeds the shift. Correct the shift or deduction; do not erase the warning formula.
    • The break contains a fraction or text. Use a nonnegative whole number of minutes.
    • A total says CHECK SHIFTS. Review that employee’s Shifts rows for an invalid input.

    After fixing inputs, inspect the whole row and weekly total. A workbook can have mathematically valid times and still contain an unavailable employee, double-booking or a role gap. Those need a separate roster review.

    Print and share the workbook carefully

    Use the Schedule sheet for a readable output and inspect print preview. The export sets a landscape layout and repeats the heading rows, but application and printer behavior can vary. Check page width, names, dates and totals before saving a PDF.

    Keep an editable master with a clear revision label. A PDF is useful for sharing a fixed view; it is not a replacement for the workbook or a JSON browser backup. Share employee data only through an appropriate controlled method.

    Keep an untouched export for comparison

    Save the initial workbook under a clear name before extensive editing. Make a working copy and change a few inputs first. If a formula later disappears or a linked name looks wrong, compare the affected cell with the untouched version rather than guessing what belonged there.

    When copying a name or role, paste only into the intended input cells. When copying a time, confirm the destination still uses a valid time value and the intended display format. A visually plausible “9 AM” entered as text can behave differently from a numeric spreadsheet time. Check the paid-hours formula output after the edit.

    If you need a different month or more employee rows, return to the browser preview, make those structural changes there and export again. Transfer only the intended input values after reviewing the new workbook’s dates. This is safer than extending a linked workbook by dragging formulas whose employee IDs or row references you have not checked. Keep the final workbook, fixed PDF and website JSON backup clearly named so that the team knows which file is editable and which system it belongs to.

    Frequently asked questions

    Can I add extra rows directly in Excel?

    These exports have linked formulas for the generated rows. Adding rows or changing their order requires careful formula maintenance. The simplest supported route is to add employees in the browser template preview and export again.

    Can the workbook store multiple shifts per day?

    The template workbook provides one employee/date assignment row. For split shifts, use the schedule maker, which supports multiple shifts per day. Do not imply the workbook can add split shifts without adapting its structure.

    Can I restore an edited workbook into the website?

    No. Restore Backup accepts validated JSON backups, not Excel files. Keep website and spreadsheet versions clearly separated. Read the backup guide before choosing your master format.

    Verify one edit before doing many

    Change one fictional name, one shift time and one unpaid break, then check the linked grid and totals. Once you understand those connections, edit the rest of the roster and review it before use.

  • Employee Schedule Change Requests: A Simple Process

    Employee Schedule Change Requests: A Simple Process

    Employee schedule change requests should follow a clear process so managers can review availability, approve changes, and keep everyone informed.

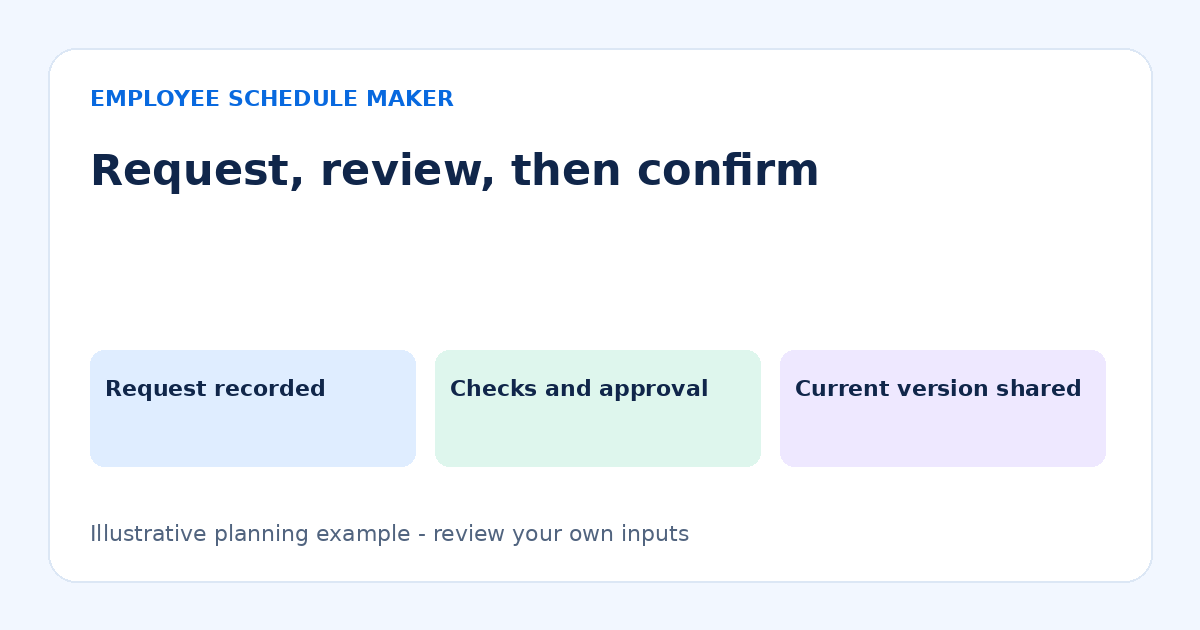
    A reliable employee schedule-change process records the requested change, checks coverage and availability, identifies who can approve it, and communicates one current version. A request is not an approval. A shift swap is not complete until the responsible person confirms it and the affected employees know the result.

    This guide gives a lightweight process for a small team. The forms and names are fictional. Adapt the process to applicable obligations and your employment arrangements; this is operational guidance rather than legal advice.

    Use one request channel

    Choose a channel employees can actually use, such as a designated form or a shared process managed by a supervisor. State who monitors it and how employees should flag an urgent issue. Do not promise instant replies unless someone can provide them.

    A conversation may start a request, but record its outcome in the chosen place. Otherwise one supervisor may approve a change that another never sees. Avoid putting sensitive personal explanations into a broadly shared roster or public comment thread.

    Collect the minimum useful information

    Fictional schedule-change request record
    Field Example
    Requested by Maya
    Current assignment Wednesday 11 November, 09:00–17:00, service
    Requested replacement Eli to cover the assignment
    Employee confirmation Eli has agreed to be considered; approval pending
    Status Pending manager review
    Decision and revision Complete only after checks and approval

    Also record when the request was received and which schedule version it concerns. For an exchange, identify both assignments. “Swap Wednesday” is ambiguous if someone has two shifts or if the roster covers several weeks.

    Check the change in a consistent order

    1. Verify the current roster

    Confirm the dates, employee and times against the approved version. A request based on an old PDF can propose changing an assignment that no longer exists. Resolve the version mismatch before editing.

    2. Check availability and agreement

    Confirm the proposed employee is available and understands the actual assignment, including role and finish time. A blank cell in the editor is not an availability record. Check the current availability form and any approved exceptions.

    3. Check skills and coverage

    Ensure the replacement can perform the required role and that the rest of the roster still works. If the change affects a lead, opener or specialist, do not assume another service employee can substitute. Check breaks and handovers as well as shift boundaries.

    4. Review the employee’s other assignments

    Look for overlaps, overnight finishes, changed paid totals and the surrounding work pattern. A shift may fit the selected day but conflict with a night assignment starting on the previous date. Use the conflict review checklist.

    5. Record the decision

    Mark approved, declined or awaiting clarification, with the responsible person and date. Explain any next action clearly. Do not leave the request appearing pending after a decision or treat silence as approval.

    A worked change and hours check

    Maya’s Wednesday shift is 09:00–17:00 with a 30-minute unpaid break, so it contains 7.5 paid hours. Eli currently has 22.5 planned paid hours that week. If Eli takes the full assignment and nothing else changes, Eli’s total becomes 30 and Maya’s total falls by 7.5.

    The schedule-wide paid total is unchanged because the same assignment moved between employees. If the total changes, check whether the original assignment was removed, the replacement uses the same times and break, or another shift changed accidentally. An unchanged total still does not prove the swap is appropriate; the availability and role checks remain necessary.

    For a true two-way exchange, calculate both employees’ before-and-after totals. Two shifts can have the same clock span but different unpaid breaks. Use the work-hour calculators rather than assuming they contribute identical paid hours.

    Apply the approved change safely

    1. Download a JSON backup of the current workspace before significant edits.
    2. Select the correct week in the schedule maker.
    3. Edit or remove the original assignment and add the confirmed replacement.
    4. Check the affected employees, paid totals and overlap warnings.
    5. Review the coverage interval and neighboring overnight assignments.
    6. Export the updated schedule and label its revision.
    7. Notify affected employees and identify which earlier version it replaces.

    The editor does not provide an approval inbox, employee notifications or a shared live team account. Keep the request and decision record in your chosen process. The tool records the roster you enter; it does not communicate approval for you.

    Communicate one current version

    Use a clear name such as “Week of 9 November 2026 — revision 2.” State what changed at an appropriate level: “Wednesday service assignment updated; revision 2 replaces revision 1.” Avoid sharing personal reasons in a team announcement.

    Ask affected employees to acknowledge the confirmed arrangement through your normal process. An export download does not show that anyone received or read it. If a printed notice is used, replace the obsolete version rather than leaving conflicting copies nearby.

    Keep backups distinct from the approved record

    A JSON file preserves editable workspace data; a PDF is a fixed sharing view. Restoring an older JSON backup can bring back an earlier roster. If you restore, inspect the revision and repeat the change checks before using the result.

    Browser schedules can be lost if browser data is cleared. Keep backups securely, and do not email employee data indiscriminately. The backup and sharing guide explains the existing download and restore workflow.

    Common mistakes

    • Editing before approval. Keep requests distinct from confirmed assignments.
    • Checking only the replacement’s selected day. Review overnight and neighboring work.
    • Leaving both original and replacement shifts. Compare totals and employee rows after editing.
    • Reusing an ambiguous filename. Include dates and a revision label.
    • Assuming the website notified employees. Communicate through your actual approved channel.

    Close the request after the roster is updated

    A request log is useful only if it reflects the final state. After an approved change is entered and communicated, record the revision that contains it. If a request is withdrawn before a decision, mark it withdrawn instead of leaving it pending. This prevents another supervisor from acting on an outdated proposal.

    For a declined request, confirm which assignment remains in place and whether another option can be considered. Keep the explanation appropriate and avoid recording sensitive personal details that are not needed for scheduling. A clear decision is more useful than a vague note such as “discussed.”

    At the end of the planning period, review repeated problems in the process: requests arriving through several channels, unclear dates, or revised files not reaching the right people. Improve one recurring step rather than adding unnecessary paperwork. The purpose of the record is to make responsibilities and the current roster clear. It does not replace timekeeping, employment records or any obligations that apply to your business.

    Frequently asked questions

    How do I politely ask for a shift change?

    State the assignment, the requested alternative and that approval is still needed. For example, fictional Maya could write: “Could you review a change to my Wednesday 11 November service shift, 09:00–17:00? Eli is willing to be considered as cover. Please confirm whether this can be approved; I understand the current roster remains in place until a decision.” Use your actual dates and follow the agreed request channel. Share personal details privately only when appropriate.

    Can employees arrange swaps themselves?

    They can propose an arrangement through your process, but clarify what approval is required before it becomes the roster. Availability and qualification checks should still occur.

    Should every small change create a new PDF?

    Use a method that keeps one current approved version identifiable. If employees rely on downloaded or printed schedules, issue an updated version and identify the replaced one. The right communication process depends on how your team receives work assignments.

    Does the tool keep an approval history?

    No. Browser backups and saved weeks are not a formal audit log of requests and decisions. Maintain the approval record separately.

    Make the next request easier

    Write down the request channel, decision owner and update method now. A short process that is followed consistently prevents more confusion than a detailed policy nobody can find.

  • How to Prevent Employee Scheduling Conflicts

    How to Prevent Employee Scheduling Conflicts

    To prevent employee scheduling conflicts, compare proposed shifts with availability, approved absences, other assignments and role requirements before publishing. Then review changes through the same checks. An overlap warning is useful, but many conflicts do not involve overlapping clock times: a shift may be outside availability or leave a required role uncovered.

    This guide separates the common conflict types and gives a practical review sequence. Examples use fictional employees and wall-clock times. The schedule maker can warn about overlapping shifts for the same employee; it does not automatically import availability, approve leave or assess legal rest requirements.

    Identify the kind of conflict first

    Scheduling conflicts and what to check
    Conflict Example Check
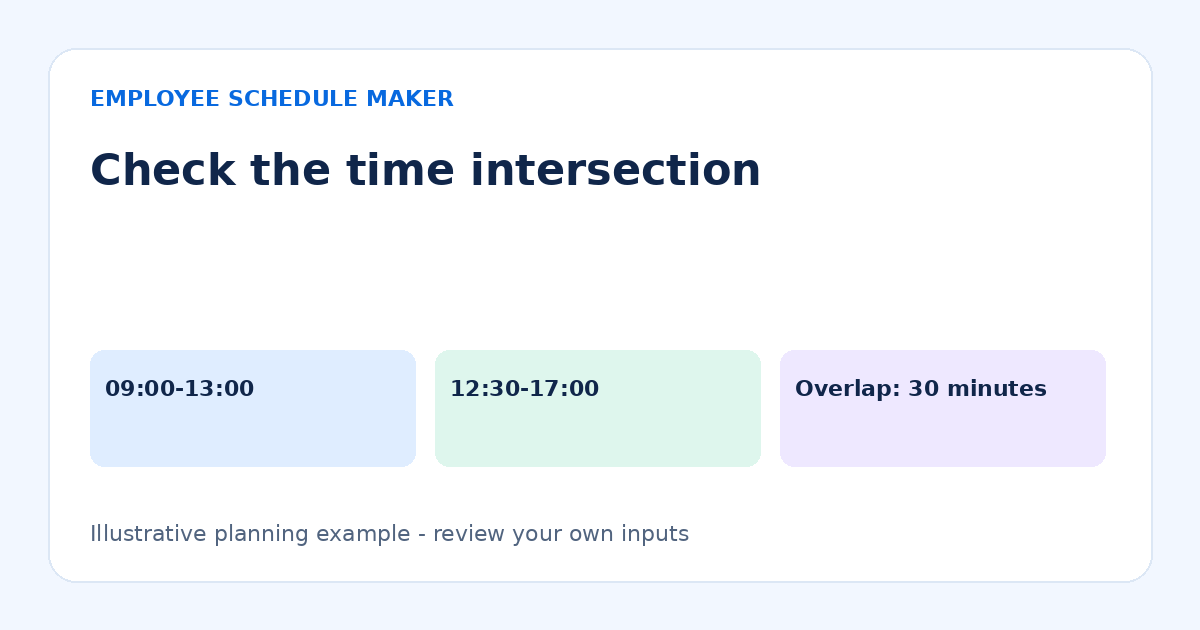
    Time overlap One person assigned 09:00–13:00 and 12:30–17:00 Exact start and finish times
    Availability mismatch Shift starts before an employee can arrive Current dated availability
    Role gap Service covered but no qualified opener Skills and role requirements
    Version conflict Two different PDFs circulate Current approved version
    Cross-day conflict Night shift extends into a morning shift Following-day finish

    Calling every problem an “overlap” can send you toward the wrong fix. Moving a shift by 30 minutes may remove a double-booking while leaving the business short of a qualified lead. Resolve the underlying constraint, then review the effect on the whole team.

    Check time boundaries accurately

    Maya is assigned Monday 09:00–13:00 and Monday 12:30–17:00. The intersection is 12:30–13:00, so the overlap is 30 minutes. If the second shift starts at 13:00, the intervals touch but do not overlap. That does not automatically make the arrangement practical: consider handovers, travel or other requirements separately.

    Do not remove an overlap by entering a longer unpaid break unless that genuinely represents the arrangement. The editor stores break duration rather than a specific break interval, so it cannot prove that two assignments can share a break period. Fix the assignment times or the staffing arrangement instead of hiding the conflict in a deduction.

    Check overnight shifts against the next date

    Suppose Eli works Monday 22:00–Tuesday 06:00 and also has a Tuesday shift from 05:30–09:00. The assignments overlap from 05:30 to 06:00 on Tuesday. Looking only at Monday’s column would miss the problem. An overnight finish earlier on the clock than its start is treated as the following day.

    With a 30-minute unpaid break, the night shift has 7.5 paid hours. The 05:30–09:00 assignment has 3.5 paid hours before any break. Adding them gives 11 planned paid hours, but those totals contain a double-booked interval. Arithmetic does not establish that the assignments are workable.

    Check the boundary between Sunday and the next Monday as well as boundaries inside the displayed week. Read the overnight shifts and breaks guide for the tool’s start-date attribution and wall-clock limitations. A week view cannot be treated as proof that neighboring weeks are conflict-free.

    Use a pre-publication review sequence

    1. Confirm the planning dates. Check that you are reviewing the intended week and not an older copy.
    2. Compare against availability and approved absences. Resolve missing or contradictory information before assigning work.
    3. Inspect same-person overlaps. Include split shifts and overnight finishes.
    4. Review role coverage. Check opening, busy intervals, breaks and closing work.
    5. Review workload and neighboring assignments. Consider the pattern and applicable requirements, not only the current screen’s total.
    6. Check employee names and roles. Similar names or duplicated employees can hide an accidental double assignment.
    7. Share one approved version. State the covered dates and how corrections should be reported.

    Use a dated availability record and a coverage matrix alongside the editor. Neither is replaced by the overlap warning. For larger teams, divide the review by role or location and have one person reconcile the combined result.

    Resolve a conflict without creating another

    First establish which assignment is correct and which can change. Ask whether another qualified, available employee can cover, whether the work can move or whether the service plan must change. Do not treat a blank schedule cell as proof that someone is available.

    After making a change, repeat the checks for the affected employee and interval. Moving Maya’s finish to 12:30 resolves the earlier overlap example, but it may remove needed service coverage from 12:30 to 13:00. Reassigning the later shift to Eli may introduce a conflict with Eli’s existing work.

    Record the confirmed change and notify the people affected. Avoid sending a revised file with the same ambiguous name as an old file. A date and revision label, such as “Week of 9 November — revision 2,” make the current version easier to identify.

    Protect the current workspace before major edits

    Download a JSON backup before testing a different template or making extensive changes. Browser-stored schedules can be lost if browser data is cleared, and a PDF cannot restore editable employees and shifts. The backup and sharing guide explains the distinction between file formats.

    Restoring a backup replaces the browser workspace after confirmation. Review its dates and contents before treating it as current. A backup from an earlier revision can reintroduce the conflict you just fixed, even if the restore itself succeeds.

    Check a proposed correction with a second view

    After fixing a conflict, inspect both the employee view and the coverage view. In the earlier Maya example, reducing the first shift to 09:00–12:30 removes the overlap with 12:30–17:00. The two assignments now meet exactly, but they may represent the same continuous work split across two entries. Confirm that two records are intended and that unpaid breaks have not been deducted twice by mistake.

    Then compare the role coverage during that interval. If the two entries represent different locations, a zero-minute gap may be impractical even though the intervals do not overlap. If they represent two roles in one location, confirm when responsibility changes and whether another worker is needed during handover.

    Finally reload the saved roster and inspect the exported version before sharing it. A correction made in a temporary template preview is not automatically the current editor workspace. Confirm which workspace you edited and whether the intended file contains the correction. This check catches a different class of error: a correct change that was made in the wrong version.

    Frequently asked questions

    Why can a schedule have no overlap warnings and still be wrong?

    The tool checks shift intervals for the same employee. Availability, skill coverage, approved leave and practical travel time are separate inputs requiring review. An empty warning list is not a complete approval.

    Are back-to-back shifts automatically safe?

    They do not overlap if one finishes exactly when the other starts. Other considerations may still make the arrangement inappropriate. Check relevant requirements and actual working conditions separately.

    Should I delete a conflicting shift immediately?

    Understand the conflict first. Editing may be more appropriate than deletion. If you delete an assignment, verify that its work is covered and that the correct version reaches affected employees.

    Can a shift cross midnight?

    Yes. Enter its start and finish and verify the following-day meaning. Equal start and finish times are invalid in this tool; they do not represent a 24-hour shift. Use explicit assignments of less than 24 hours.

    Make conflict review routine

    Build the roster, review constraints, then review every later change through the same sequence. A clear process catches errors that a single warning cannot. Start with the weekly planning guide if you need a broader workflow.

  • How to Schedule Employees Fairly: A Practical Review

    How to Schedule Employees Fairly: A Practical Review

    Learning how to schedule employees fairly starts with clear, consistent decisions about working hours, availability, and shift assignments.

    A fair employee schedule uses clear, consistent reasons for assigning hours and less popular shifts. It considers availability, role requirements, agreed working arrangements and requests, then checks whether the outcome repeatedly disadvantages the same people. Fairness does not always mean identical hours: employees may have different roles, availability or desired workloads.

    For a small business, a simple review table and an explained decision process are often more useful than an unexplained fairness score. This guide gives a practical method with fictional examples. It does not establish legal standards or promise that every preference can be met.

    Agree what you are trying to distribute

    Start by naming the assignments people care about: weekend work, late finishes, opening shifts, split days, total hours or opportunities to learn a role. Ask employees which factors matter rather than assuming everyone dislikes the same shift. One employee may prefer evenings while another relies on a morning transport connection.

    Distinguish a firm restriction from a preference. Use a current availability record and confirm the applicable employment arrangements. A rotation that ignores availability can be numerically even and still be unusable. A manager should be able to explain both the rule and a justified exception.

    Compare like with like

    Choose a review period that reflects your operation. A four-week view can reveal patterns hidden by a single week, but it is only an example. Keep employees with materially different availability or qualifications in separate comparison groups where appropriate. Document why a comparison does or does not apply.

    Fictional four-week review of comparable service employees
    Employee Paid hours Weekend assignments Closing assignments Review note
    Maya 120 4 6 Closing pattern needs review
    Eli 120 4 2 Same closing availability as Maya
    Rory 80 2 0 Agreed morning-only availability

    Maya and Eli have equal paid hours and weekend counts, but Maya has more closing assignments. That is a useful question to investigate, not proof of unfair treatment. Perhaps Maya requested them, or perhaps the pattern was copied without review. Rory’s lower hours and zero closings need to be understood in the context of the morning-only arrangement.

    Build a transparent scheduling process

    1. Record the non-negotiable coverage needs

    Identify the work and required skills for each interval. See how to plan busy-hour coverage. A qualified opener may need to be assigned before flexible service work. Make that reasoning visible so an employee is not left to infer favoritism from a result.

    2. Collect requests through one channel

    Use a consistent request method and acknowledge responses. A request sent privately to one supervisor should not silently displace a previously approved request held by another. Record decisions and effective dates without placing personal explanations in the shared roster.

    3. Rotate the assignments that need rotation

    For comparable employees who can work a closing shift, keep a simple count over the review period. When practical, assign the next closing opportunity using the agreed rotation. If a required skill or an employee preference changes the decision, note the reason and revisit the balance later.

    4. Review hours and less visible burdens

    Check short shifts, inconvenient gaps and repeated changes as well as total hours. Two 30-hour weeks may feel very different if one is spread across three days and the other across six. Ask whether the pattern is workable rather than treating one total as the entire answer.

    5. Explain exceptions and offer a review path

    A manager may need to make an exception, but unexplained exceptions erode trust. State the operational reason at an appropriate level and tell employees how to raise a concern. Do not disclose another employee’s confidential circumstances to justify a roster.

    A worked hours example

    Suppose Maya and Eli each receive four shifts of 8 elapsed hours, with a 30-minute unpaid break per shift. Each has 4 × 7.5 = 30 paid hours. A proposal to “balance hours” by giving Eli another full shift would produce 37.5 hours for Eli while Maya remains at 30. That changes the distribution rather than correcting the closing imbalance.

    An alternative is to exchange one eligible closing assignment for a daytime assignment of equal paid duration, with both employees’ availability checked. The hours stay at 30 each, and the closing counts move toward balance. Before confirming the exchange, check the skill mix, neighboring shifts and any applicable policies or legal obligations.

    The schedule maker calculates paid hours and flags overlapping shifts for the same employee. It does not evaluate fairness, contractual hours, rest requirements or preferences. Keep the review record separately and use the tool’s totals as one input.

    Use a simple review log

    Record the date, the pattern reviewed, the decision and when you will check it again. “Next four-week cycle: review closing counts for Maya and Eli” is more useful than “make next month fairer.” Use counts that can be checked against actual assignments and avoid subjective labels about employees.

    After publishing a schedule, distinguish an employee-requested swap from a manager-requested change. Both alter the roster, but they may matter differently when reviewing how often people experience disruption. A clear schedule-change process helps preserve that context.

    Common mistakes

    • Equating fairness with equal hours. Check availability, role and agreed workload before comparing totals.
    • Always asking the most flexible person. Review who absorbs late changes, even when they usually agree.
    • Copying a familiar pattern indefinitely. Repeated copies can preserve an imbalance nobody intended.
    • Using a hidden scoring formula. Explain the factors and allow corrections to inaccurate inputs.
    • Promising every request will be granted. Explain how conflicts will be considered and what alternatives may exist.

    Discuss the result without exposing private information

    When an employee asks why their pattern differs, explain the relevant allocation process and their own assignments. You can say that closing opportunities are reviewed over a defined period and that qualifications and confirmed availability affect the result. You do not need to disclose someone else’s personal reason for an availability restriction.

    Invite corrections to the facts. Perhaps a closing count includes a shift that was later swapped, or the availability record has not been updated. Correcting the input is often more useful than debating the conclusion from an inaccurate table. Record whether the concern changes next week’s plan or requires a longer review.

    Keep a decision modest and specific. A manager might agree to review Maya’s next eligible closing assignment rather than promise an exact permanent distribution that the operation cannot maintain. At the next review, check whether the action happened and whether its effect was useful. This makes fairness an ongoing, explainable practice instead of a claim that the software or a single spreadsheet has settled every concern.

    Frequently asked questions

    Does a fair schedule require everyone to work weekends?

    Not necessarily. Availability, role requirements and employment arrangements differ. Choose an approach appropriate to your team and verify applicable obligations rather than imposing a universal rule from an example.

    How far back should I compare assignments?

    Use a period long enough to reveal your recurring pattern, then review it consistently. A short period can overemphasize a holiday; a very long one can hide a recent problem. Explain which dates you are comparing.

    Can employee preferences change the rotation?

    Yes, when the arrangement is understood and workable. Confirm whether someone actually prefers the assignment and whether that preference is current. Avoid assuming that a past willingness is permanent consent to every future change.

    Can software guarantee fairness?

    No single hours total can capture every relevant circumstance. The tool can make assignments and arithmetic visible; people still need to verify inputs, explain decisions and listen to concerns.

    Review one pattern first

    Choose one issue your team can describe clearly, such as closing assignments over the next four weeks. Build a weekly roster, check the counts and discuss the result. Consistent, understandable review is more useful than an ambitious system that nobody maintains.

  • How to Plan Staff Coverage for Busy Hours

    How to Plan Staff Coverage for Busy Hours

    Staff coverage planning means matching the number and skills of available workers to the work expected in each time interval. Start with demand by hour or half-hour, translate it into role requirements, and then test whether the proposed shifts actually cover those requirements. A weekly total alone cannot show whether enough people are present during your busiest hour.

    This guide uses a fictional small café to demonstrate the method. The numbers are planning assumptions, not industry benchmarks. Use your own observations and operating requirements, then enter the resulting shifts in the employee schedule maker.

    Start with work, not last week’s roster

    List opening, service and closing tasks separately. A shop may have quiet sales at 08:30 but still need deliveries checked and tills prepared. A restaurant may need preparation before customers arrive. For each period, identify the role, required skills and whether the work can move to a quieter time.

    Review several comparable trading days if you have records. Note events, deliveries, appointments and unusual promotions rather than averaging them away. A single busy Saturday does not establish every future Saturday’s demand. If records are limited, observe a few intervals, state your assumptions and review them after the schedule is used.

    Build a small coverage matrix

    In this fictional example, the café requires one service worker throughout trading and an additional service worker for the lunchtime rush. A separate lead is present during preparation and trading. The table counts positions, not named employees.

    Illustrative Tuesday coverage requirements
    Time Service positions Lead positions Reason
    08:00–09:00 0 1 Preparation and opening
    09:00–11:00 1 1 Regular service
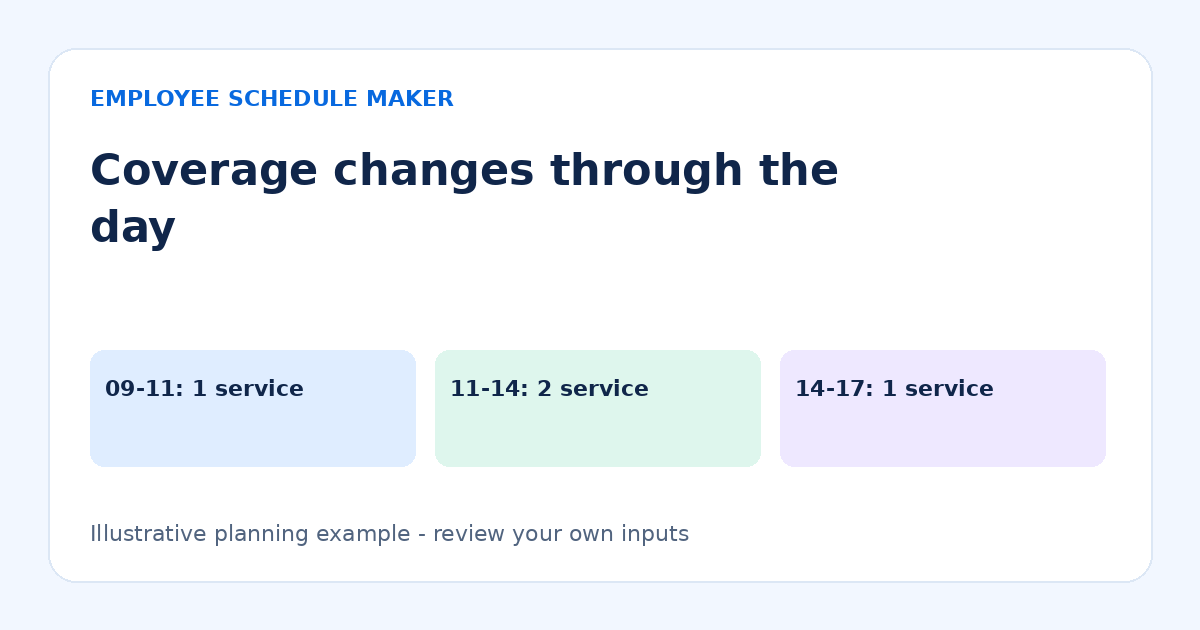
    11:00–14:00 2 1 Expected lunch demand
    14:00–17:00 1 1 Regular service and close

    The service requirement is 2 hours × 1 position, plus 3 hours × 2 positions, plus 3 hours × 1 position: 11 service position-hours. The lead requirement is 9 position-hours. Combined required coverage is 20 position-hours. This calculation excludes relief, handovers and any extra closing time; those must be added explicitly where needed.

    Translate positions into proposed shifts

    Give the fictional lead Noor an 08:00–17:00 assignment, Maya service from 09:00–17:00, and Eli service from 11:00–14:00. The elapsed scheduled time is 9 + 8 + 3 = 20 hours. It appears to match the matrix, but the apparent fit assumes all three people are available for every minute of their assignments.

    If Noor and Maya each take a 30-minute unpaid break, the paid-hours total becomes 19. The team also loses one lead position for 30 minutes and one service position for 30 minutes unless another qualified person covers. Deducting break duration in a calculator does not place relief into the roster. This is why paid hours, elapsed shifts and coverage hours answer different questions.

    Use intervals to find the actual gap

    Check the roster at every shift start, shift finish and planned break boundary. For each interval, count people who are present, available and qualified for the required role. A person should not be counted in two positions simultaneously unless the work genuinely allows that and the assumption has been checked.

    For example, moving Maya’s break to 14:00 does not solve coverage if Eli finishes at 14:00 and Maya is the only remaining service worker. Extending Eli to 14:30 could cover that service break, but it still does not cover Noor’s lead duties. Resolve each role separately rather than hiding the problem in the total.

    A repeatable planning process

    1. Choose an interval. Thirty minutes is often a manageable starting point for a small operation. Use shorter intervals where demand changes quickly.
    2. Write the minimum role requirement. Include opening and closing tasks and explain assumptions.
    3. Check availability. Use a dated employee availability record, including role limits and approved absences.
    4. Assign the hard-to-cover periods first. Identify the qualified lead or specialist before filling flexible work.
    5. Add handovers and break relief. Record their timing outside the tool if required; the editor stores break duration, not a timed break plan.
    6. Review the whole day. Check the quiet edges as carefully as the peak.
    7. Compare the plan with actual experience. Adjust the next roster using observations rather than copying an untested assumption.

    Use hourly totals carefully

    The paid-hour calculators help confirm shift arithmetic. They cannot tell you how many transactions one worker can handle, whether a role needs specialist training, or how many staff your particular business should have. Choose those inputs from your operation and explain them to whoever reviews the roster.

    When estimating a cost, distinguish scheduled paid hours from the employee’s actual recorded work. This site’s planning totals are not a payroll record. If work runs late or an unpaid break is not actually taken, a manager must review the real circumstances through the appropriate timekeeping process.

    Plan for changes without pretending to predict everything

    Prepare a response for a short-notice absence or an unexpectedly busy period. Identify whom you may contact, which tasks can move and when to reduce or change service. Do not label a person “backup” unless the arrangement is clear to them. The roster cannot guarantee attendance or eliminate uncertainty.

    A useful review note might say: “Tuesday lunch required a third service person from 12:00 to 12:30 because of a group booking.” That is more actionable than “Tuesday felt understaffed.” Keep personal information out of shared notes and use a consistent date and interval.

    Common coverage mistakes

    • Using a daily headcount. Five employees working at different times do not mean five are available at noon.
    • Counting unpaid breaks as coverage. Check the planned timing and qualified relief.
    • Ignoring role mix. Three available service employees do not automatically replace a required lead.
    • Stopping at closing time. Include cleanup, reconciliation or handover work when it is needed.
    • Scheduling only to an average. Inspect busy intervals and the reasons behind exceptions.

    Review one actual trading day

    After using the fictional Tuesday plan, compare the expected busy period with what happened. Record a few concrete observations: which interval had a queue, which task was delayed, whether a delivery coincided with lunch, and whether the planned break relief was available. Keep this review about work and intervals rather than judging an employee from a single unusual event.

    If demand was quiet at 11:00 but heavy at 13:30, moving the second service assignment may be more useful than increasing the whole day’s hours. Test the revised start and finish against availability and the closing workload. A change that helps the rush can still create a gap at the edges.

    Retain the original assumption beside the revised one so you can explain the decision next week. For example: “Keep two service positions until 14:30 on booking days; review after the next two comparable dates.” That is a testable local planning decision. It is more useful than treating a general staffing ratio from another business as a reliable rule for your café.

    Frequently asked questions

    How do I calculate coverage hours?

    For each interval, multiply its duration by the required number of positions, then sum the intervals. Keep separate totals for roles that cannot substitute for one another. Add relief requirements explicitly.

    Can overlapping shifts be useful?

    Yes. Different employees’ shifts may deliberately overlap for demand or handover. An overlap warning for the same employee is a different issue: it may indicate double-booking. Review the people, roles and actual time boundaries.

    Should I copy last week’s coverage?

    Use it as a starting point only. Check events, availability, absences and observed demand. See the weekly scheduling guide for the broader review sequence.

    Put the matrix beside the roster

    Choose a restaurant, retail or small-business template, assign realistic shifts and compare each interval with the coverage matrix. A roster becomes easier to defend and improve when you can explain which work each assignment covers.

  • Employee Availability Template: Collect Workable Hours

    Employee Availability Template: Collect Workable Hours

    An employee availability template records when someone can work before you assign shifts. Keep it separate from the published schedule: availability describes possible working windows; a schedule makes actual assignments. A simple table with dates, available times, exceptions and a review date helps a small team avoid repeatedly asking the same questions.

    This guide shows how to collect useful availability without treating preferences as guarantees. The examples use fictional people. You can collect answers in a spreadsheet or a printed form, then enter agreed shifts in the employee schedule maker. The tool does not automatically collect availability or approve requests.

    What belongs in an availability form?

    Collect only information needed to plan work. Ask for the employee’s name, role, dates the availability applies, earliest start and latest finish for each day, and whether a window is a firm restriction or a preference. Include a way to report one-off exceptions and a date for the next review. Do not ask employees to explain sensitive personal circumstances in a shared spreadsheet.

    Use precise language. “Evenings” might mean after 4 PM to one person and after 7 PM to another. “Available Tuesday 16:00–22:00” gives you a boundary you can check. For overnight availability, state both dates or label the following-day finish. An available window is not a promise of a particular number of hours.

    A practical employee availability template

    Copy this structure into your own document. These fictional answers apply to the week beginning Monday 9 November 2026. “Unavailable” means do not assign a shift in that period; an empty cell means the answer is missing and needs clarification.

    Fictional availability collection example
    Employee / role Monday Tuesday Wednesday Thursday Friday
    Maya / service 09:00–17:00 09:00–17:00 Unavailable 09:00–17:00 09:00–15:00
    Eli / service 16:00–22:00 16:00–22:00 16:00–22:00 Unavailable 14:00–22:00
    Noor / lead 08:00–16:00 08:00–16:00 08:00–16:00 08:00–16:00 08:00–16:00

    Add weekend columns if you trade on Saturday or Sunday. Add separate rows when someone has two available windows on a day, such as 08:00–11:00 and 16:00–20:00. Do not merge those into 08:00–20:00, which would incorrectly imply that the middle of the day is available.

    Collect and confirm availability in five steps

    1. Define the planning period

    State exactly which week or range of weeks the form covers. For a recurring pattern, record an effective start date and an expiry or review date. A university timetable or transport arrangement can change. A form from six months ago should not silently govern next week’s assignments.

    2. Separate constraints from requests

    Ask employees to mark unavailable periods, workable periods and preferences distinctly. “Cannot work Wednesday” differs from “would prefer Wednesday off.” Managers should not decide that distinction by guessing. If someone offers broad availability but wants fewer hours, record the desired hours separately and explain how assignments will be decided.

    3. Check role and coverage needs

    Availability alone does not establish that a person can fill a role. Identify which shifts need a lead, trained opener or another specific skill. Compare available people with your busy-hour coverage plan. If nobody qualified is available for a required period, resolve that gap before promising a finished schedule.

    4. Confirm ambiguous answers privately

    Clarify blank cells, unclear AM/PM times and overnight limits. Ask whether a latest finish of 22:00 includes closing tasks. Ask whether a Saturday 00:00 finish means the end of Friday’s shift or the beginning of Saturday. Repeat the agreed interpretation back in a short written summary.

    5. Record changes with a date

    Maintain one current availability record and a simple change log. Record who requested the update, when it becomes effective and who acknowledged it. Restrict access to people who need the information. A published roster should not expose everyone’s private availability notes.

    Turn availability into actual shifts

    Suppose you need two service employees from 16:00 to 18:00 on Monday. Maya can work until 17:00 and Eli can start at 16:00. They cover two positions from 16:00 to 17:00, but only Eli remains from 17:00 to 18:00. The availability table has revealed a one-person gap; it has not solved it.

    If Maya agrees to work 09:00–17:00 with a 30-minute unpaid break, that assignment is 7.5 paid hours. Eli’s 16:00–22:00 shift with a 15-minute unpaid break is 5.75 paid hours. Combined paid hours are 13.25. Those totals do not prove continuous coverage because the timing of the breaks still matters. Use the work-hour calculators for duration checks and a separate coverage review for staffing.

    Start with a blank weekly or part-time template, enter agreed assignments, and compare every shift against the current availability record. The schedule maker stores shifts and unpaid-break duration; it is not an availability database. Keep the collection form in your chosen controlled location.

    Common mistakes and practical fixes

    • Treating no response as open availability. Mark missing answers as unresolved and follow up before assigning work.
    • Sharing personal explanations. Keep the public planning record to usable times and approved restrictions.
    • Ignoring travel between locations. Two non-overlapping shifts can still be impractical if a transfer is required.
    • Changing an employee’s answer to fit demand. Discuss a request for extra availability separately; preserve the original response.
    • Using stale information. Add a review reminder before a new season, term or operating-hours change.

    Review a changed availability window

    Suppose Eli previously offered Tuesday 16:00–22:00, but next week can start only at 18:00. Record the effective date before editing a recurring form. The old window may still be correct for this week, while the new one applies to the following Tuesday. Keep those periods distinct so you do not change an already agreed assignment unintentionally.

    Next compare the new window with the proposed roster. If Eli was assigned 16:00–22:00, the first two hours need a decision. Moving the start to 18:00 reduces the assignment to four elapsed hours, but it may leave a service gap from 16:00 to 18:00. Ask a qualified, available person about that interval or revise the operating plan. Do not assume the employee who finishes at 17:00 can simply stay later.

    Finally, record the confirmed schedule change separately from the availability change. Tell Eli which assignment is approved and update the shared roster through your normal process. This small distinction prevents a common misunderstanding: an employee submits new availability and assumes the current schedule has already changed, while the manager believes it remains unchanged until reviewed.

    Frequently asked questions

    Is availability the same as an approved schedule?

    No. Availability describes when an employee says they can work. An approved schedule states when they are assigned. Explain your process for turning one into the other and for resolving requests that cannot all be met.

    Should a template include requested days off?

    Yes, but distinguish a request awaiting a decision from an approved absence and a recurring unavailable period. Otherwise a manager may mistake an unreviewed request for a confirmed arrangement.

    Can I use one form for employees with changing hours?

    Yes. Use a dated form for each planning period rather than relying on a permanent weekly pattern. A rolling two-week view can help, provided each employee knows when responses are needed and how late changes are handled.

    Does this replace employment policies?

    No. This is a planning example, not legal advice or a rule about what availability an employer may require. Check applicable obligations and your own arrangements before changing an availability process.

    Your next step

    Collect one clearly dated set of answers, resolve the missing windows and compare it with required coverage. Then build the actual roster. A small, current availability record is more useful than an elaborate form nobody updates.